3 Reasons Your Circuit Breaker May Have Tripped

Your circuit breaker has tripped. You’ve located your electrical service panel and flipped the switch for the room you were in but it keeps tripping – either right away or after you try to turn on the appliance you were using. You’ll need the help of Conductive Electrical Contracting in order to identify the root cause of your problem but there are generally three main causes.
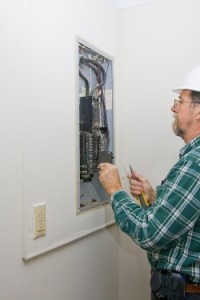
image of Electrician working on circuit breakersOverloaded Circuits

Circuit breaker trips are most commonly caused by overloaded circuits. This usually happens when the household is attempting to pull a higher voltage of electricity through the breaker than it was intended to be able to handle.

When this happens, the circuit breaker’s automatic safety settings cause it to shut itself down, or break. Running too many high-energy appliances at the same time, like a portable heater and a hair dryer, may cause overheating.

While you’ll need to have your electrician confirm that this is the case, simply unplugging or shutting off some of the appliances connected to the circuit in question will usually correct the issue.

Short Circuits

Short circuits are the second most common reason for breaker tripping and are a more serious concern. Short circuits occur when the black hot wires inside your electrical service panel come in contact with either other hot wires or neutral wires.

Your electrician will help you to inspect your power cords and outlets for damage and will ensure the wires within your electrical service panel and near your outlets are all properly insulated.

Improper or Faulty Grounding

A ground fault is the least common reason for a circuit breaker to trip but is the most serious. This situation occurs when the hot wires within your electrical service panel come into contact with the metal panel box.

Your electrical service panel box is connected directly to the ground wire and the two coming into contact will cause short circuiting. You’ll need a electrician to come out to either check for damage to the wires or to correct the wire placement.

Never try to correct a problem with your electrical service panel or circuit breakers without the aid of a licensed electrician in Delaware. They have the training to identify and correct common problems while limiting your exposure to electrical hazards.

Services We Offer:

Swimming Pool Wiring, Circuit Panel Upgrades, General Electrical Repairs, All Electrical Services

Cities we Serve

Wilmington, Newark, Dover, Greenville, Hockessin, Pike Creek, All Locations

Upgrading Your Service Panel in 2023

Performing an electrical service panel upgrade or upgrading your service panel is an important task that must be done on every home to ensure that your home electrical circuits are always safe. But, what are the best practices and guidelines that should be followed?

Electrical Service Panel Guidelines and Information

Do you really need a sub-contractor to do this work?  Do you require any permits? What costs are involved? What problems are likely to occur? Well, here we provide all the answers to your questions and solutions, offering the best advice and guidelines that you should follow when you require this kind of work done.

A person checking a checklistThe following are the most important details that you should follow to ensure that the job gets done professionally and correctly, and these items should also be included in any contracts and contractor work checklists, and tied to payments:


  • Before the start of any work, you should make sure that the location, layout, style and appearance of the panel, and any materials used are correct and approved with the contractor.
  • Ensure that all the electrical elements including connectors, fasteners, and other items used are fully compatible with the new panel.
  • The guidelines stipulate that the panel must be flush to the mounting surface, and that the base and trim are completely and properly attached.
  • Neat, uniform cut outs will be made as per the panel upgrade guidelines so that no air gaps are evident and that the panel is not visible when the cover plates are installed. Any large gaps and spaces must be insulated and sealed.
  • The new panel must be anchored securely to its structural framing.
  • Make sure it will conform to manufacturer’s requirements, and will operate correctly.
  • According to the guidelines, all work must meet or exceed any and all code requirements.
  • It must be correctly grounded with proper polarity in order to deliver the correct voltage.
  • The correct size wiring will be used to ensure full design performance and safe operation of the panel.

FAQ’s

These are just some of the commonly asked questions relating to the upgrade of an electrical service panel:

Do You Need a Permit?

Usually some kind of permit or design approval is required from your local building office for the installation of a new panel, so you will need to find out and apply for one before you start any work. The contractor you hire for the job should organize this for you.

upgrading your service panelCan I Do the Job Myself?

No, this is not the kind of job that you can do yourself, no matter how proficient you are. The installation of an electrical service panel requires the expertise of a professional who uses the correct tools, materials and fabrication methods as set out in the upgrade guidelines. Any DIY mistakes will result in the loss of marketability of your home as well as decrease the value, plus it will be very costly to fix.

Do I Need to Hire a Professional Electrical Contractor?

Yes, you must be very thorough when it comes to selecting the professional contractor to perform this task. They must be highly experienced and know how to install the panel correctly to ensure optimal performance.

What Can I Expect to Pay for This Work?

The installation of a new electrical service panel can cost anywhere between $320 and $1000 per panel, and this all depends on the time of year, the size of the project, the location and quality of workmanship. You are also looking at additional fees for rush jobs.

How Long Does the Upgrade Usually Take?

You can expect an installation to take between 1 and 3 days depending on the scope of the job.

Panel Upgrade Guidelines for Milestones and Project Reminders

The tasks listed below are what normally get completed during the installation of an electrical panel. You should use these tasks to ensure that the job is completed properly and complies with all vendor or manufacturer warranty requirements. These tasks or milestones should be listed in the contract work order in the following order, and ticked off and paid for as they are completed.

  • The written contract outlining the job, detailing the materials and tools used, including information about quality checks and warranties, as well as payment terms must be drafted and signed by both parties before work commences.
  • Next you will need to choose and order the new panel that you want. The order should clearly identify the grade, type, size, color, finish, and other options, as well as the quantity. Additionally the delivery date and terms are included, as well as damage insurance details.
  • Once the service panel is delivered, the details must all be verified against the order to ensure that the correct item was delivered. A thorough inspection of the service panel must take place to assess any damage and correct operation. The final payment for the panel can now be authorized.
  • Now that you have the panel, you must confirm a start date and time for the sub-contractor, which is usually a week prior to the start date.
  • Get the permits required from your local building authority and post this on the job site as required.
  • When the sub-contractor comes in, they should install it using corrosion resistant screws as per local building codes and manufacturer guidelines.
  • Schedule an inspection of the new upgrade.
  • Any permit issues must then be corrected to bring it up to code after which a final inspection must be scheduled.
  • The inspection to verify that all the quality panel upgrade guidelines are met must be done also ensuring that the check list items are completed correctly.
  • Connect the electrical panel to the power using a hardwired connection in the closed junction box or grounded receptacle.
  • The circuits must then be clearly labeled as per the upgrade guidelines with the circuit type and the area.

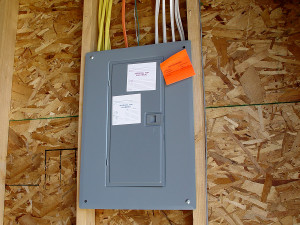
An electrical service panel

With these questions, checklist details, and service panel upgrade guidelines, the process of getting a new service panel installed should be simple and hassle free.  See this page for more information.

Replacing your Pool Pump with a New Energy Efficient Pool Pump

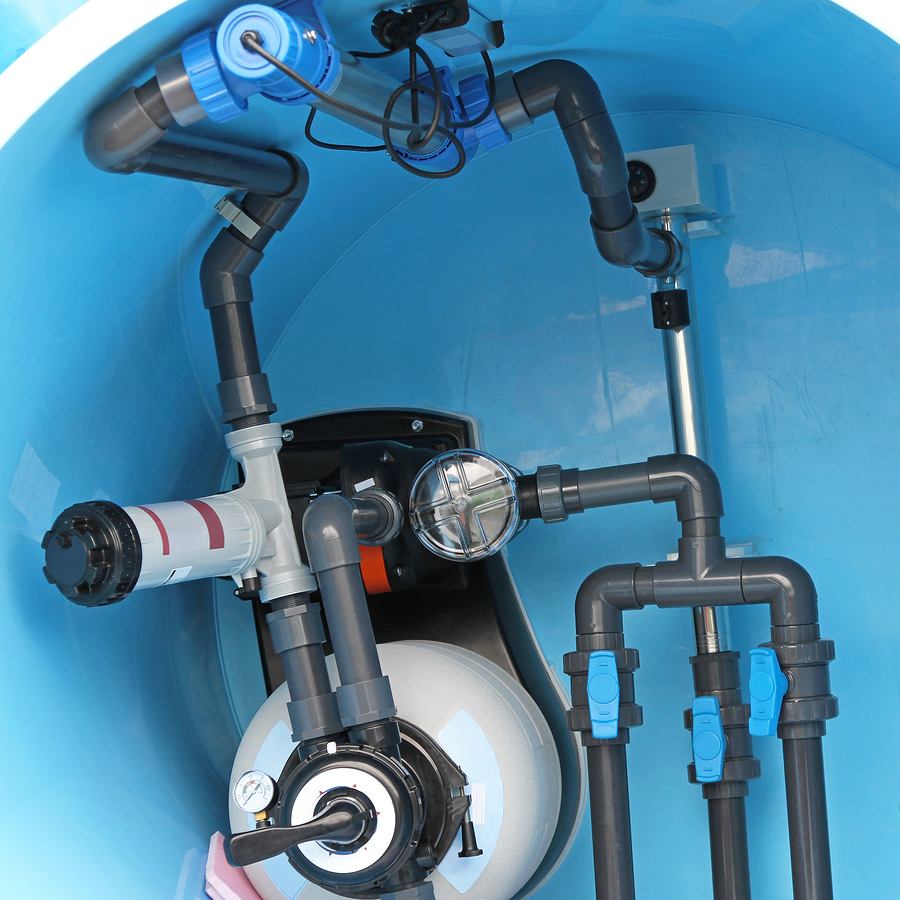
Swimming pool water plumbing fittings and utilities

According to Green Building Advisor, your pool pump may use as much as three times the amount of electricity as your refrigerator. The solution – replace your pool pump with a new, energy efficient pool pump.

In a study by the Center for Energy Conservation at Florida Atlantic, pool owners saved 40% off of their energy bills, among other things that help save money on energy bills.

So, to help you stay cool and beat the heat without the electric bills breaking the bank, we are here to show you how to easily replace your pool pump with an energy efficient pool pump.

DISCLAIMER: If you are overwhelmed, uncomfortable or unqualified to work wires and electricity, DO NOT proceed. Contact a licensed electrician to replace your pump.

The DIY Guide to Replacing Your Pool Pump

Step 1: Choosing an Equivalent Energy Efficient Pump

When replacing your pool pump, keep in mind that you want to replace it with a pump of equivalent size to ensure that the new pump will generate the same Gallons per Minute of water flow.

In order to do this, you will need to determine the Total HP (THP) of the new energy efficient pump.

For example, if your old, non-energy efficient pump is a 1.5 HP and the new energy efficient pump is listed as 1 HP, calculate the new pump’s HP (in this case, 1) and multiply it by its Service Factor (SF=1.5) so the total HP would be 1.5, making it equivalent to the old pump.

Step 2: Removing the Old Pool Pump

*Safety Must: Before beginning to replace your pool pump, TURN OFF ALL POWER to your pool pump at the breaker box.

DISCLAIMER:
You are advised to consult with a Licensed Electrician
when performing any electrical repairs.

Once the power has been turned off, it is time to begin disconnecting your wires. Remove the cover of the pump by unscrewing the two screws holding it to the end of the motor. Take the green, red, and black wires off of the terminals.

DISCLAIMER: If you are overwhelmed, uncomfortable or unqualified to work wires and electricity, DO NOT proceed. Contact a licensed electrician to disconnect and reconnect the pumps. 

Unscrew the collar of the conduit in order to disconnect it from the old pool pump. Pull the three wires through the metal elbow.

After the wires have been pulled through the elbow, you can unscrew the elbow and discard. Remove the copper bonding wire from the lug on the pool pump motor and now you’re ready to cut the old pump out.

Relieve the pressure in the system before cutting the pipe. Once the pressure has been released, cut the pipe, making the cut as square as possible.

Tip: Using a PVC pipe cutter helps achieve straighter and more precise cutting.

Now, your pump can be removed.

Step 3: Installing the New Energy Efficient Pump

First, attach the pump to the motor with nuts and bolts. You will notice that the water line is coming from the pool toward the suction side of your pump so place a shut-off valve on that same side, and on the side of the pump that contains an outlet, attach a line.

Now, it’s time to get the new pump connected by connecting the filter assembly of the discharge line using unions and a flush valve on the side that is discharged from the filter of the new pool pump.

Finally, you will connect the shut-off valve and pipe that will connect the pump to your pool.

DISCLAIMER: If you are overwhelmed, uncomfortable or unqualified to work wires and electricity, DO NOT proceed. Contact a licensed electrician to replace your pump. 

How much will this cost?

The cost of replacing your pool pump may vary depending on several factors such as location, product, any professional assistance, etc.

To determine an approximate cost of replacing your old pool pump with a new energy efficient pool pump, use this online calculator.

The benefits of replacing your old pool pump with a new energy efficient pump will save your money in the long run and is a relatively easy process.

We at Conductive Electrical Contracting hope this DIY Guide was helpful. If you would like to speak to one of our professionals about replacing your pool pump, give us a call at 302-319-4061.

7 Tips for Year-Round Electrical Safety

Electrical safety is important not only during the holiday season but throughout the entire year. While having your local contractor check your electrical service panel is important, there are several things you can do to ensure you and your family are able to remain safe each and every day. Consider the following tips.

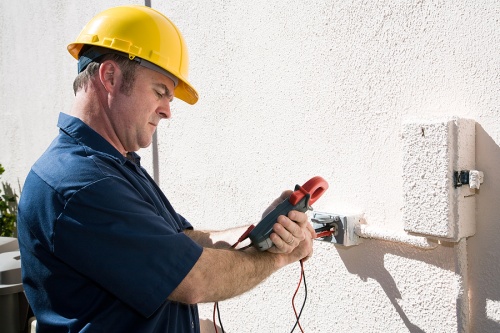
image of Man Checking Voltage with meter

Avoid Flooded Homes

This tip is especially important to those who live in hurricane paths and to those who live in areas prone to storms and flooding. While you may think it is safe to go back to your home the minute the flood waters begin to recede, you need to think again.

You run the risk of accidental electrocution if the power to your home has not been shut off properly. Check for fallen power lines and turn the electricity off as soon as you arrive. Let the utility company or your electrician in DE do a safety check before you turn the power back on.

Downed Power Lines

Let’s say there’s a storm and one of your power lines falls from the poles outside or disconnects from your home. Your entire area is experiencing a power outage. You may think that it is safe to go and move the power line because the power in your neighborhood is out but nothing could be further from the truth.

Downed power lines can experience surges in electricity at any time. Never touch them. Simply wait for a power company electrician to come and move them or make repairs.

Safety during Repairs

Is making a repair to an electrical appliance or part of your home absolutely necessary?

Make sure you turn off the power and stay away from wet floors or areas of your home during the process to avoid electrocution. You’ll also want to make sure you are using a ladder made with insulated fiberglass instead of aluminum.

Use Surge Protectors

Surge protectors are great for keeping your electronics – like televisions and computers – safe from electrical problems caused by brownouts, circuit overloads, and other problems with your electrical system.

Your surge protector will let you know if your outlet is properly grounded and usually includes an indicator light to let you know that the surge protector is functioning properly.

Bathroom Outlets

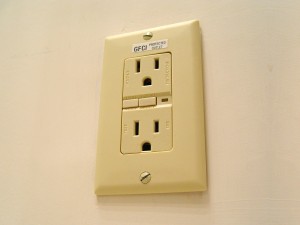
The outlet in your bathroom should be different than the outlets found in the rest of your home. Your bathroom outlets should have a GFCI (Ground Fault Circuit Interrupter) feature.

This feature is designed to keep you safe from electrical shock if the water in your bathroom sink or shower splashes near an outlet. Ask your electrician about having GFCI outlets installed if you do not already have them.

Light Bulb Safety

All lamps and light fixtures are designed to be used with a specific sized light bulb. The wattage is always clearly marked on the lamp and you should never, under any circumstances, attempt to use a bulb that is stronger or weaker than the recommended wattage. Doing so can cause your lamp to overheat and malfunction, risking the start of an electrical fire.

Unplug Unused Appliances

There is really no reason to have your coffee pots, toaster ovens, toasters, or any other kitchen appliances plugged in when they are not in use. Unplugging your appliances will cut your energy costs, prevent you from overloading your circuits, and will reduce the risk of injury caused by working near powered appliances while washing dishes or working with water.

Electrical safety in the home is, for the most part, a matter of common sense. Talk to Conductive right away if you need help determining if your home is safe from electrical hazards!  Click here for some of the areas we serve.

5 Common Electrical Wiring Problems

Modern electronics and appliances our homes must power.It’s not simply the country’s energy framework that is out of date. The wiring inside numerous homes is likewise out of date, straining to supply our always growing collections of power hungry appliances, lighting, and gadgets.
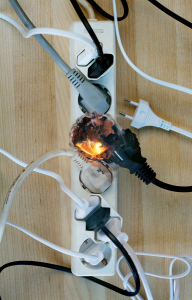
The circuits in older homes weren’t intended to power the numerous contraptions of our current lifestyle. The indications of strain may be self-evident as a tangle of additional lines and electrical extensions growing from a solitary outlet – or hiding unseen behind dividers, roofs, and junction covers.

Some wiring issues are simply mild annoyances. In some cases others can pose genuine fire or shock hazards. If you’re purchasing a house (particularly one that is more than 50 years of age), or you’ve never had your wiring examined, its a good idea to contact an authorized electrical repairman to give your home an exhaustive inspection.

They will take a look at the protection on the wires to check whether it’s shriveled and fraying, they’ll search for consumption in the administration board, and they’ll look to check whether a past owner did anything risky with their wiring.

Don’t be worried too much if the inspection turns up to be code infringement. Each time the electrical wiring regulations and code is updated, old wiring is “grandfathered,” on the supposition it was introduced accurately in the first place.

Code just requires you to upgrade wiring in rooms being gut-redesigned or homes being currently built.

To help you survey the condition of your own electrical framework, we’ve listed the 5 most common wiring issues we see, the dangers they pose, and the suggested solutions.

Keep in mind: Anytime you work with wiring, make sure to turn off the circuit from the main switch.

1. Overlamping

What it implies: A light apparatus has a bulb with a higher wattage than the installation is intended for.

Code infringement? Yes.

Risk level: High. The bulb’s excessive heat can sear or melt the attachment and protection on the installation’s wires, which builds the danger of arcing — sparks that bounce through the air starting with one wire then move onto the next — a prime reason for electrical flames. The harm to attachments and wires stays even after the bulb has been taken out.

Solution: Stay inside the parameters recorded on all light installations made since 1985. For more seasoned, unmarked installations, utilize just 60-watt bulbs or smaller.

2. Revealed Junction Box

What it implies: Because an intersection box houses the connections where wires are joined with each other, an individual could accidentally harm the wires or get a shock.

Code infringement? Yes.

Risk level: Minimal. The length of wires aren’t protected.

Solution: Spend a couple dollars to purchase another cover and install it with the screws provided.

3. Excessively Few Outlets

Fire from an overloaded power strip.

What it implies: Heavy dependence on electrical lines and electrical extensions.

Code infringement? No; grandfathered in. (Today’s codes require outlets inside 4 feet of an entryway and each 12 feet from that point.)

Risk level: Minimal. The thickness of additional cords should be 14-gauge or thicker. (The thicker the wire, the lower the gauge number.) Undersize additional lines (16-gauge or smaller) can overheat and spark a flame if power burdens are excessive.

Solution: Add more outlets. Expect to pay some electrical experts about $100 for every first-floor outlet and twice that for second-floor work. There will probably be a base charge, but cost varies from electrician to electrician.

This work requires cutting gaps in dividers and roofs to snake the wires. A few electrical technicians will fix the holes when the work is complete; others leave the fixing to you.

4. Overwired Panel

What it implies: The board contains a greater number of circuits than its made to handle, in light of the fact that an excess of single-post breakers (one circuit) have been supplanted with pair breakers (two circuits) in one space.

Pair breakers aren’t the same as high-amp twofold shaft breakers, which bring up two openings with one circuit. A name on each circuit board indicates what number of circuits the board can handle.

Code infringement? Yes.

Risk level: Minimal. It may turn into an issue when the house is sold and an inspector looks inside the board.

Solution: Add a sub panel with a couple of additional spaces, or, if you’re arranging real home upgrades, replace your current panel with a bigger model (price may be $500 to $800 depending on the model and installation prices).

5. Aluminum Wiring

What it implies: You have a sort of wiring, utilized as a part of the 1960s and ’70s as a shoddy substitute for copper, that is no longer considered safe.

Code infringement? No; grandfathered in.

Risk level: High. Aluminum erodes when in contact with copper, so connections slacken, which can prompt sparking and flames.

Learn more about aluminum wiring and fixes you can use if you have it.

Solution: Retrofit a dielectric wire nut endorsed for aluminum wire onto each copper/aluminum association in light installations. These nuts have an uncommon oil that stops erosion while keeping up conductivity. Verify that any substitution switches and repositories are marked AL-perf.

For electrical wiring help please contact Conductive Electric at 302-319-4061 or request an estimate here.

What is a GFCI Outlet?

A ground fault can happen when some electricity escapes the confines of the standard electrical wiring in a light fixture, appliance, power tool or other device and has to find somewhere else to go.

When this shortcut is taken through a human, it can prove to be deadly. Every year, about 200 people in the United States die of ground faults. This accounts for about two thirds of all the electrocutions occurring in homes.

GFCI Safety Electrical OutletWhat is a GFCI Outlet?

In order to prevent such accidents, a renowned professor of Electrical Engineering at the University of California, Charles Dalziel, invented the Ground Fault Circuit Interrupter (GFCI) in 1961.

What it does is monitor the standard difference in the current flowing into or out of an appliance or tool.

When this difference exceeds 5 milliamps, the GFCI takes it as an indication that a ground fault might be occurring.

If a ground fault is occurring, the outlet shuts off the electric supply in an instant. Most of the time, it takes only .025 seconds for the GFCI to shut off the supply.

Where Do You Usually Find GFCI?

Most concerned authorities have realized the importance of these units to prevent minor and major accidents related to electricity.

Therefore, the National Electric Code requires GFCIs in all new bathrooms, kitchens, unfinished basements, crawl spaces, and outdoor receptacles.

It is advised that owners of older houses retrofit with GFCI receptacles at the locations mentioned above. They may also choose GFCI breaker switches, which are mounted in the primary breaker panel.

How Do You Know GFCI Is Working?

The best part about using GFCIs is that they can easily protect you whether your wiring is grounded or not. According to most studies and industry experts, they can keep homeowners safe and prevent accidents that could have otherwise been fatal.

Since power surges and lightning can damage these units, most experts recommend a simple monthly test. You can test them by plugging in a regular light fixture and switch it on.

The next step is to push the device’s test button. If your light fixture stays on, the GFCI should be replaced. You may need to call on Conductive Electrical Contracting if your unit is faulty or damaged.

In the last few years, GFCI units have become extremely popular in the United States. Homeowners are learning their importance to keep themselves safe from unexpected accidents related to ground faults.

5 Things You Should Know about Electrical Wiring

The electrical wiring system within any building can look incredibly complex to anyone not well-versed in the way such systems work. It doesn’t matter if you’re in a residential area or in a commercial complex – people are dependent upon power yet know very little about it. Here are some things we thought you should know about electrical wiring in general.

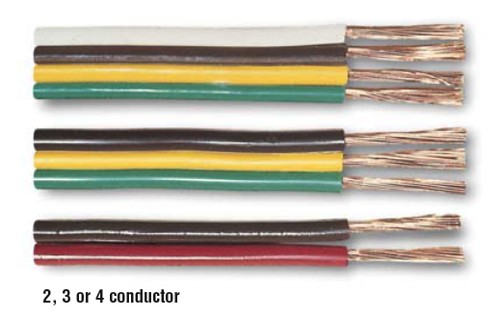
Wiring Color Codes

Wiring Codes

Electrical codes seem like a pain, but they were created to help protect both you and your home. The codes, first established in 1891 in New York state, were put in place to ensure that the right type of wiring is used in each area. This reduces the risk of a malfunction or surge in your electrical system – one that could cause damage like electrocution or fire.

Electrical Wiring Color Codes

Electrical wiring comes in different colors for a reason. Each color tells us something specific about the wire and what it is used for. The most common colors are black, red, blue, yellow, green, and bare copper.

  • Black wires indicate that a wire is hot. They usually lead to outlets and switches.
  • Red wires also indicate a hot connection. They’re commonly used with appliances that require a 220 volt connection. They can often be found connected to ceiling fans or hardwired alarms like smoke detectors.
  • Yellow wires and blue wires are also used for hot connections, but they are used in switches that have three or four-way connections. You’ll often see these connected to lights and fans.
  • Bare copper and green wires are usually used to create safe connections during grounding.

There are a few exceptions to the wire color rules. White wires, for example, often indicate something is neutral, but they can also be used as hot wires where an additional is needed. If you use a wire for something other than it’s normal, color-coded purpose you should mark it with a piece of colored electrical tape so that it matches the normal coding.

Aluminum Wiring is Outdated

Older homes were wired with aluminum wiring but today’s codes call for copper wiring. Sadly, many homes built during the Vietnam War timeframe used aluminum because copper was being used by the military. The US Consumer Product Safety Commission estimates, on average, that a home with aluminum wiring has a 50x higher risk of developing a fire hazard issue. If that’s not a reason for an electrical upgrade, we don’t know what is.

Downed Wires are Still Energized

Do not assume that a power line is de-engergized simply because it is down or because the power in your house has gone out. They might be without energy, but they may still be holding a low level of energy. There is also no way of knowing if the power will suddenly kick back on. Your best bet is to stay away from downed wires until the pros arrive on the scene.

Rewiring a Home is a Huge Project

We’re often asked why rewiring the entire electrical system in a home is so expensive. Sadly, if you need your entire house rewired your electrical contractor will have to open up all of your walls in order to get to the old wires, replace them, and reconnect them to your outlets and switches. They they, of course, have to put your home back together again. You can save yourself some cash if you rewire your home during a remodeling project, but if you don’t have one planned and don’t have the budget for a total re-wire, you can help yourself out by making upgrades here and there so that you don’t end up subjecting yourself to a fire hazard.

Wiring can be tricky and messy, but with a talented residential or commercial contractor or electrician on your side you can’t go wrong. Never make an assumption when it comes to your household wiring. Call a professional electrician and get the right answers the first time.

Child Safe or Tamper Resistant Outlets

Having child safe outlets will ensure that your children are safe from the dangers presented by the inevitable curiosity of when they ask, “what happens if I stick this inside of that little hole”?

Electrical outlets are found in every building in modernized countries. They’re the connection between your home or business’s electrical wiring system and your appliances, lights, and fixtures. They can also be a source of danger – especially if you have an electrical outlet in reach of small children.

Electrical Outlets

Types of Electrical Outlets in Homes

You’ll find two main types of electrical outlets in the United States – the Type A and the Type B. The Type A is the traditional 2-prong outlet used to provide 120 volts of electricity.

While you are likely to find a Type A outlet in an older home, especially those built before the 70’s, it has generally been phased out and is no longer installed.

The Type B outlet was used to replace the Type A outlet. This familiar outlet requires the use of three prongs – two flat blades, like the Type A, along with a round grounding pin. One of the blades is wider than the other to ensure the plugs are inserted properly.

There are, of course, different variations on the Type B outlet and wiring. Most notable is the GFCI outlet, which is commonly used in bathrooms and kitchens to provide added protection. GFCI receptacles are commonly placed on their own circuits – so your bathroom and living room will not share circuits.

Protecting Your Children from Electrical Hazards

We all know how curious children can be when it comes to any object in the home. Your job is to teach them, at a young age, what is appropriate and what is not in terms of outlets and electricity in general.

Start by taking a look around your home. Identify all of the outlets and their placement and note which ones are not in use.

Have an electrician replace the standard outlets with child proof or tamper resistant outlets.  The child proof or tamper resistant outlets have a special mechanism inside that close off the contact openings, or slots, of the receptacles preventing your child from inserting something dangerous into one of the holes.

If having all of your outlets in your home replaced with tamper proof outlets is not in your budget, add safety caps instead.  Safety caps can be inserted into any unused outlet in your home. This will benefit you in two ways.

Your child won’t be tempted to place his fingers or any other item in the outlet, and you’ll also help to prevent drafts in your home.

Your next step is to set a good example. Children learn by watching and if they see you treating power cords and outlets carelessly, they’ll simply imitate your behavior.

Try not to work with your wiring or outlets while your young children are around.

If this can’t be helped, make sure you are always unplugging cords properly at the base and not by yanking them from the wall – a technique that can cause damage in more ways than one.

Talk to your children about asking for help whenever they want to use a toy or appliance that calls for the use of electricity.

Teach your child to ask for help so that you can remove safety caps and plug in the toys yourself – and make sure you are the one who unplugs them after play as well.

Make sure your child sees you replacing the safety cap and explain that they are there to keep everyone safe.

Children are bound to test the boundaries you place for them in all aspects of life, but make sure they know how dangerous an electrical outlet can be if not treated properly. In addition to your guidance and teaching, making sure you have child safe, tamper-proof outlets will add peace of mind.

Security Lighting for Safety at Home

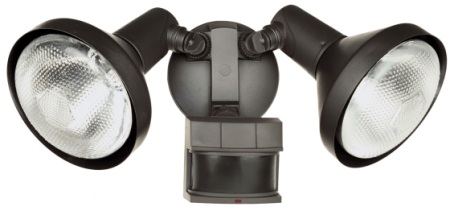
image of Security flood lights

Which Type of Lighting is Best for You?

There are many different types of flood lighting and security lighting products on the market today. The three main techniques for this type of home protection are as follows:

  1. Dusk to Dawn Lighting – Just as their name implies, these lights come on every night at dusk and go off every morning at dawn. They do this through sensors that respond to the sunlight. The downside to this type of security lighting is that the lights are constantly on, all night every night, thus burning a lot of electricity and bulbs. They will also stay on all day on rainy or cloudy days and, since they are always on, neighbors won’t be alerted if a burglar did decide to brave the brightly lit yard.
  2. Motion Activated Lighting – These flood lights stay off until a motion is detected in the area. Then, they shine brightly and are great for making a possible burglar highly visible, alerting you that someone is in the yard, and also alerting neighbors that something is amiss. These lights are much better for the power bill and offer better security in some opinions.
  3. Dusk to Dawn Motion Activated – This third security lighting technique is a cross between the former two where the lights come on at a dim wattage at dusk, and stay on dimly until dawn. If someone wanders into your yard, they suddenly burst out into bright light. This may be a preferred method for those who like being able to see into the yard at night but still wish to save electricity.

It’s easy to see how these different lighting techniques would make your home much safer. Everyone knows that more crimes, such as burglaries, home invasions, robberies, and attacks occur at night.

This shows that these evil-doers prefer to work in the dark. If they’re “casing” a neighborhood trying to decide which house to burglarize, they’re much less likely to choose the house that’s brightest lit. This is precisely why some people may choose technique number one.

If you’re not too worried about a home invasion and hiring a private security company is a bit out of the question, but you still want to protect the items in your front and back yards or on your porches, then you may be interested in the second or third techniques described above.

Both are excellent for “catching them in the act” so to speak. Someone who may be used to waltzing into your yard, and “borrowing” tools or other items, would definitely be caught by surprise if you’re using this method.

Any of the three lighting techniques are excellent choices for security lighting. Making the decision about which one to use is really based upon your need. No matter what type of security lighting you decide to use, you shouldn’t try to install any type of electrical additions yourself.

Talk to a licensed electrician like Conductive Electric who can come to your home and advise you as to how many, and which, extra breakers you may need in order to handle the extra wattage of these lights. A professionally licensed electrician can also give you an estimate of the cost and help you decide which method best suits your wallet, as well as your security lighting needs.

Areas we Serve:  Wilmington, Newark, Pike Creek, Dover, Hockessin, Greenville, Smyrna and more.

Services we Offer:  General Electrical Repairs, Service Panel Upgrades, Backup Generator Installation, Electrical Wiring & Bonding for Pools, Lighting Installation,  Whole House Surge Protection, Ceiling Fan Installation and more.

Lighting the Exterior Landscape

When it comes to providing lighting for the exterior landscape, less is definitely more.  It is important to create a subtle lighting experience for the viewing of the landscape at night, and not to overwhelm the beauty of the area with too much lighting.

While flood lighting and other bright lights are fine for some situations, when it comes to lighting the garden and the landscape subtlety should be the guiding principle.

Landscape lighting tends to work best when used in specific parts of the landscape, and when used sparingly.  It is important to choose the locations for the lights carefully, and to use lighting fixtures that are unobtrusive and natural in appearance.

Solar lighting is a good choice for landscape lights, since no wiring will be required.  These lights are designed to soak up power from the sun all day, and then automatically come on when night falls.  These solar lights can also be easily moved from place to place, until you have found the perfect location.

When it comes to placing the lights, it is important to consider the shadows that will be created by the landscape lighting.  Placing a few lights in the right places can create unique and fascinating shadows and images that can make the nighttime landscape even more attractive than the daytime one.

landscape lightingIt is of course important to take the neighbors into consideration when placing those exterior lights.  It is important to avoid having the lights shine into a neighbor’s window, or otherwise detract from their own enjoyment of the home and surrounding landscape.

While some landscape lighting is purely ascetic in nature, other types of exterior lights, such as driveway lights, and the lights along pathways, are more practical.

When placing such lights, it is important to place them so that the light falls at your feet and guides your way in safety.  If the light is placed too high, the glare may be blinding, so it is best to place driveway and pathway lights at a low angle.

Get your landscape lighting professionally installed by Conductive Electric or a local electrician in your city.